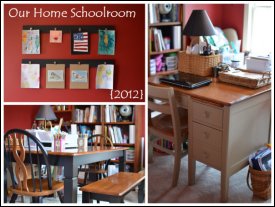
 Hi, I'm Heidi and I homeschool my two sweet kids. I want them to know that learning is an exciting lifelong adventure! We love great books, unit studies, notebooking, lapbooking, and hands-on learning.
Moon Nature Study
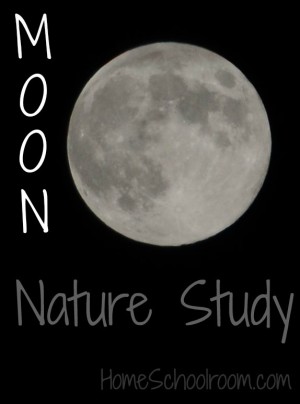
Why does the moon look so different each night?
Following along in nature study with Barb’s Outdoor Hour Challenges at the Handbook of Nature Study blog, we spent a month learning about the phases of the moon.
The first priority was observation: we looked at the moon any clear night from one full moon to the next. One night that involved a fun late evening ride in pajamas for a beautiful view from the local football field.
Note: I took the photo at the beginning of this post. If you want a good moon shot use your manual settings to basically underexpose the photo (my aperture was f/5.6, shutter speed 1/1250). To prevent blurring be sure to use a tripod, or if you’re like me and don’t want to go get your tripod just rest your camera on something stable–I used the post on my front steps. Voila, a moon picture to enjoy!
To record our observations we drew the moon several times for our nature journal as it changed throughout the month.
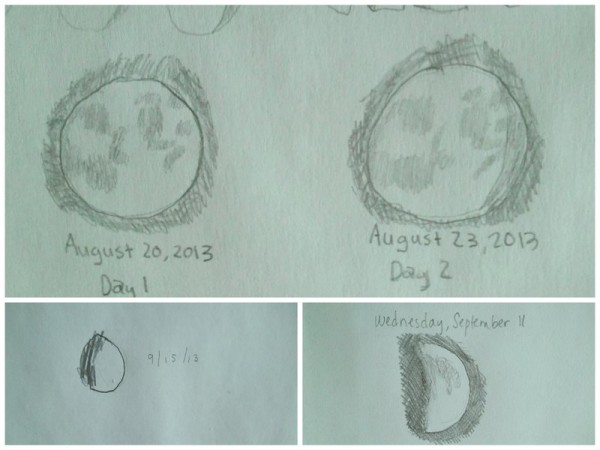
Tip: The kids traced a quarter to start with a nice circle and keep their moons a consistent size.
As with any study we read books from the library. Our favorite was The Moon by Seymour Simon. It has wonderful photos and information, including the stories of the Apollo space program.
Barb shared links to a couple kid-friendly YouTube videos that we enjoyed: one on the distance between the earth and moon in her Moon and Craters Study, and a terrific (and humorous) video on the phases of the moon in her post from a year ago on Moon Names.
To give my kids a better understanding of why we can only see parts of the moon sometimes we headed to the deep, dark basement for a hands-on demonstration of the moon phases. This idea was in the Handbook of Nature Study by Anna Botsford Comstock–a terrific nature study reference book.
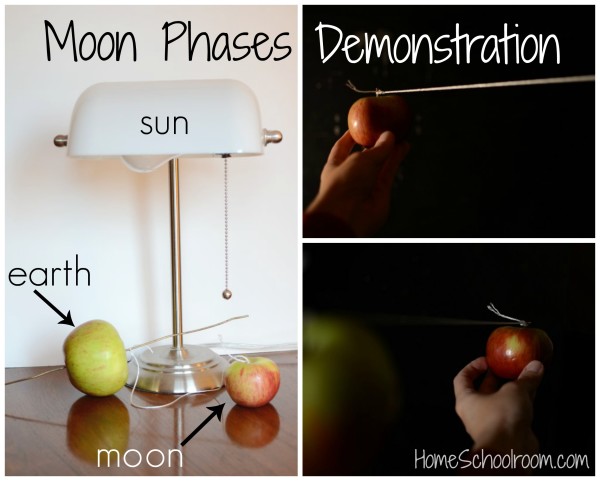
Basically the lamp is your moon, the apple mounted on stiff wire (I cut a piece of wire coat hanger) is your earth, and the small apple tied to the wire is your moon. Position yourselves to look from the vantage point of the earth apple, and you will clearly see the phases in the light falling on the moon apple. I love simple demonstrations!
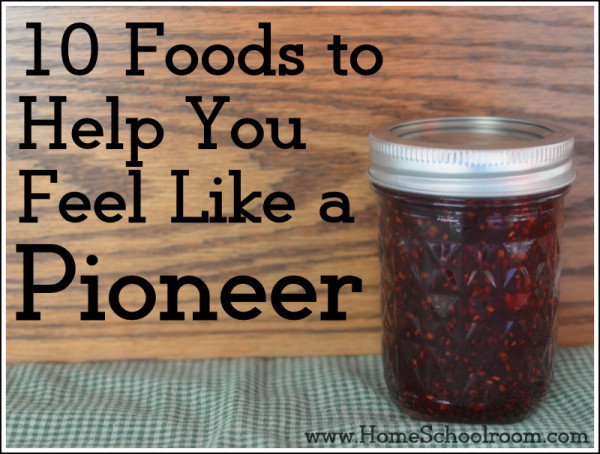
10 Foods to Help You Feel Like a Pioneer
I am a homeschooler and I love to eat, so it should come as no surprise that I like to prepare foods that go along with our studies! I shared about the foods we ate during our study of the 50 States, and today I’m sharing foods we enjoyed during our study of the pioneers of the 1800s.
We actually had a few opportunities to focus on food from this time period: my daughter had a Little House themed birthday party, I shared about pioneer life for her Girl Scout troop, and we invited friends over for a chuck-wagon style dinner as an end of unit celebration.
Snacks and Sides:
1. Homemade Bread: I shared this recipe for simple whole wheat bread during my Tea Time post last week. It really is an easy to make homemade bread even for the novice bread-baker. It’s a great way to show the kids how much different it is to make bread from scratch rather than pick up a loaf at the store.
2. Homemade Butter: I’ve made butter with three groups of kids and it’s not only fun but gives them great insight into the work required for every little thing you ate before the days of supermarkets.
- Put some heavy cream into a glass jar with a tight-fitting lid. I use a canning jar and fill it about half full.
- Then shake, shake, shake! After a while you’ll see whipped cream in your jar.
- Keep shaking until you see yellow lumps.
- Keep shaking until you have a big yellow lump (butter) and some white liquid (buttermilk–save it to make pancakes with the next day!)
3. Canning: This isn’t a recipe for a certain food, but an activity I highly recommend you try with your kids. Make a batch of jam (strawberry, blackberry–anything!) or pickles. We’ve canned a few times and I’m always amazed at the amount of work. We work together on it, it takes half a day and makes a big mess, and we talk about how they had to preserve enough food to last them through the winter. If you’re a total novice, the Ball Complete Book of Home Preserving is a great guide that covers all the basics and has lots of recipes.
4. Cornbread: I’m partial to this recipe for honey cornbread from Allrecipes.com, but would love to try this authentic-looking recipe for Little House style cornbread that adds bacon grease and cooks in a cast iron skillet.
5. Apple Butter: This is a nice treat on a slice of homemade bread. We made ours in the oven using a recipe from American Kids in History: Pioneer Days (a great book, by the way, with lots of ideas for things to make, do, and eat). Allrecipes.com has a recipe for apple butter that cooks in the crockpot.
Main Course
A full pioneer style dinner calls for a simple and filling main course.
6. Beef Stew: Again, if we’re using bullion we’re cheating a bit, but this recipe for a fairly simple beef stew is a satisfying main course.
7. Baked Beans: This simple recipe for baked beans has ingredients pioneers might have had on hand. We use a recipe from my husband’s Aunt Alice. Hopefully I don’t get in trouble for giving out a secret family recipe!
- 2 pounds soldier beans
- 1/2 pound salt pork
- 1 medium onion
- 2 tsp dry mustard
- 3/4 cup brown sugar
- 1 1/2 cup maple syrup
- 1/2 cup molasses
Soak the beans overnight. In the morning boil them for 5-7 minutes. Add everything to a bean pot, add water just to cover and bake for 8 hours at 275 degrees. We don’t have a bean pot so we use a crock pot on low for 8-10 hours.
A Sweet Ending
8. Apple Pandowdy: I tried this recipe for Pandowdy. It’s sort of like a cobbler though messier looking, but in a bubbly and delicious sort of way.
9. Sugar on Snow: We had actually tried sugar on snow during our Maple Syrup unit study.
10. Pie, with a homemade crust: Does any one else love the convenience of the easy unroll-and-bake refrigerated pie crusts? For the pioneer experience make a pie crust from scratch and have the kids help you with the whole messy job. Fill it with apples or pumpkins (if you’re really adventurous you could skip canned pumpkin and prepare the pumpkin yourself) or for a main course try chicken pot pie. This pie crust recipe I learned at a pie-making class. (And forgive me for the shortening. I do try to avoid it!)
- 4 cups flour
- 1/2 cup sugar
- 1 teaspoon salt
- 1 3/4 cup shortening
- 1 egg
- 1 1/2 teaspoon lemon juice
- 1/2 cup water
Mix flour, sugar, salt and shortening by hand until it crumbles. Add wet ingredients just until mixed. Roll out and proceed with your yummy pie recipe. Makes four crusts.
Don’t forget to enlist your kids’ help preparing these foods from scratch–they’ll understand a little more about life for children during that time period. In truth we aren’t even getting the full experience since we didn’t have to grow and thresh the wheat to make our flour, or slaughter the animals, and Ma Ingalls certainly didn’t have nicely ground dried spices from the store or canned chicken stock. It may not be fully authentic but it helps us understand how much work was involved in making all their food–and that children had to help!
Hop over to iHomeschool network to see what other homeschool bloggers are cooking up.
This blog hop series was inspired by Angie of Many Little Blessings where you’re welcome to link up, too!

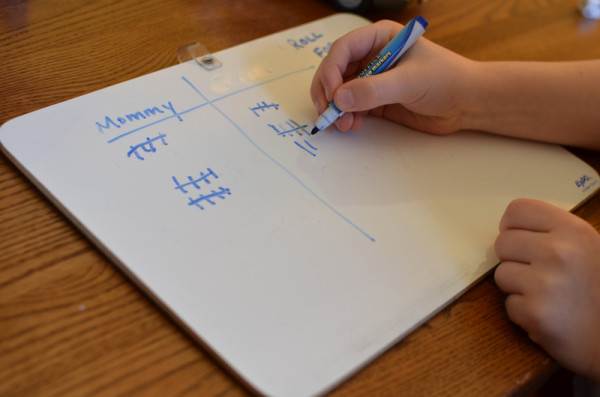
Hands-On Math: Practice with Tally Marks
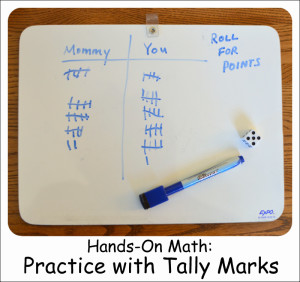
Simple supplies are all you need to practice with tally marks. We used a whiteboard (though pencil and paper would work) and a single die for a quick and easy game that provided lots of practice making tally marks, adding to existing marks, and counting up tallies. (Bonus math: practice counting by fives!)
I avoid a workbook style math curriculum for my son, after realizing in Kindergarten that it did not suit his learning style. We use the Life of Fred Elementary Series and an old series of books called I Love Math.
Life of Fred works well because the books focus on understanding math concepts, are based on funny stories, and each chapter only has a handful of questions. The I Love Math series (only available used) also contains stories, along with games, word problems, and suggestions for hands-on activities.
As needed I find extra hands-on practice for math concepts: like playing store for coin recognition and dividing items for even and odd.
We read about tally marks in I Love Math: How Do Octupi Eat Pizza Pie and I realized a little practice was in order. The book suggested counting straws, but I figured a little competitive game would be more fun.
I grabbed a die and small white board. I told him the simple rules: we take turns rolling the die, whoever gets to 25 points first wins! I kept tallies for the first game. On the second game it was his turn to keep track of our scores. (He decided the game needed a name, so we worked together to pick “Roll for Points.”)
This game is quick and easy, so we’ll play it once in a while until he’s a pro with tally marks. Maybe later we’ll add extra dice, make the point goal higher, or even add the numbers on the dice together!
What are your favorite math games, whether it’s one you bought or made up yourself?
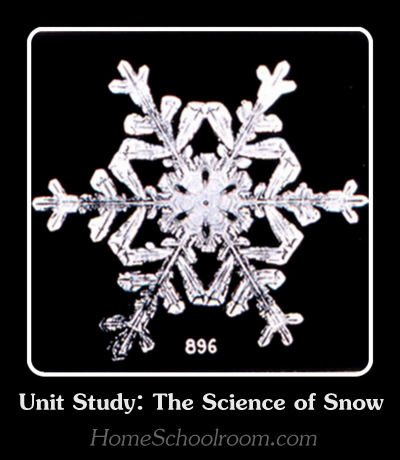
Unit Study: The Science of Snow
Our local public school was on vacation this week. I don’t usually take those weeks completely off, but they are perfect weeks to drop the regular curriculum and enjoy a fun unit study.
Though some of you may be fortunate enough that late February is the end of winter, in Maine spring is still weeks (months!) away. Great timing for a unit study on snow, focusing on the scientific aspects of snowflakes and crystals. After piquing their interest with the microscopic wonder of snowflakes I wanted to teach them about crystals and answer the question: Is it true that no two snowflakes are alike?
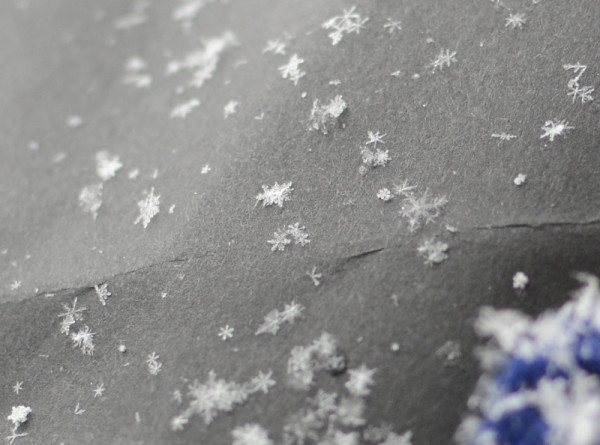
Wow! Snowflakes are miraculous!
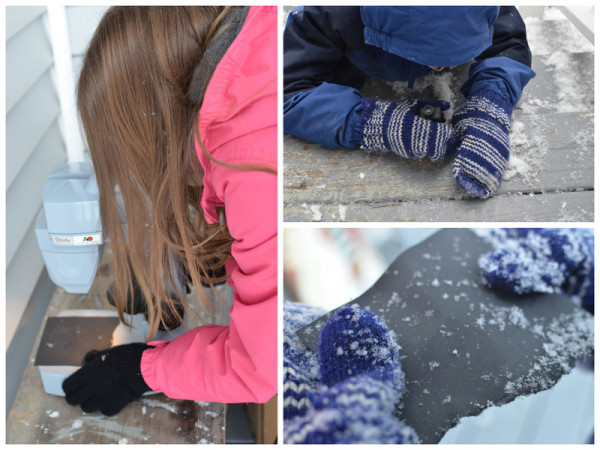
I laid the foundation for their interest a couple weeks ago when I saw large, beautiful flakes falling outside. Grabbing the piece of black paper I’d been keeping in my freezer for just such an occasion, we headed outside with various magnification tools: hand lenses, pocket microscopes, and a stereoscope. I highly recommend this activity whether you go on to study snowflakes or not.
Then this week we kicked off the unit with the picture book Snowflake Bentley about Wilson Bentley, a man who lived in Vermont and spent his life photographing snowflakes to share their beauty with the world.
Homeschool Share offers a free lapbook to go along with this book and is where I found all the minibooks we used. We also perused the thousands of images in Wilson Bentley’s original book, Snow Crystals.
Learning about snowflakes and crystals
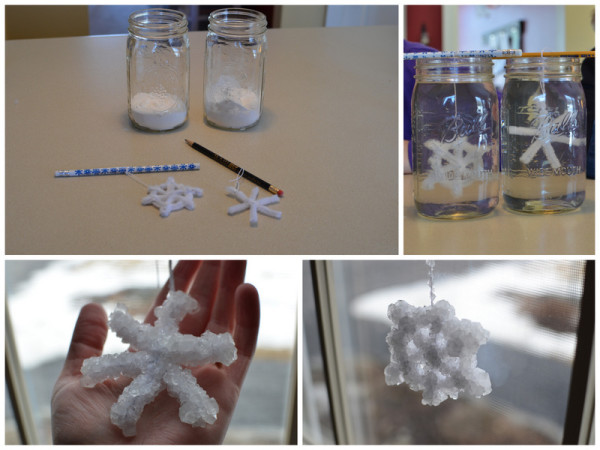
What better way to learn about crystals than to grow them? Making Borax snowflakes gave us the chance to watch crystal formation and drive home the main point: crystals arrange themselves into the patterns dictated by their molecules. While Borax crystals are simple cubes it is the same process that forms the intricate patterns found in each snowflake.
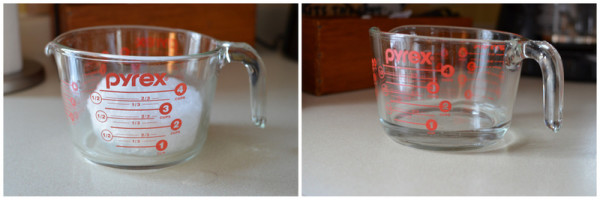
We brought in some snow and made guesses about how much water we would have when it melted. (All of our guesses were too high!) A nice printable from the Homeschool Share unit recorded the information. I used the physical demonstration from Living and Learning at Home to explain the scientific basis for it: we stood near each other with our arms out and realized we couldn’t stand very close to each other. With arms at our side we could pack ourselves in much more closely–just like the water molecules!
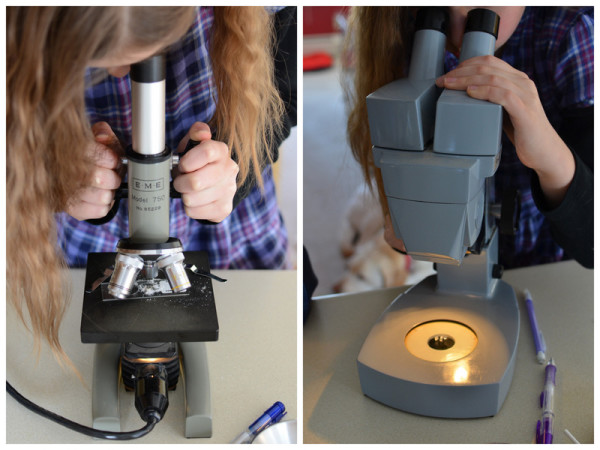
We brought out the microscopes to examine crystals of Borax, salt and sugar. My favorite part about using microscopes is how they increase our wonder at nature: when you see the tiny details you can’t help but be amazed!
Is it true that no two snowflakes are alike?
The book I used to cover the scientific information was The Snowflake: Winter’s Secret Beauty by Kenneth Libbrecht. This book was too advanced to be used as a read aloud, but was perfect for a picture walk. We looked at the images of modern snowflake photography and read the informative captions. This is great video clip about the author:
Once we learned about the factors affecting snow crystal formation, temperature and humidity, it was easy to understand the variety of patterns. As each individual snow crystal moves through different parts of the cloud due to wind and gravity the shapes on the branches tell the history of the conditions it went through. Since no two snowflakes follow exactly the same path to the ground, no two will be truly identical!
The Extras
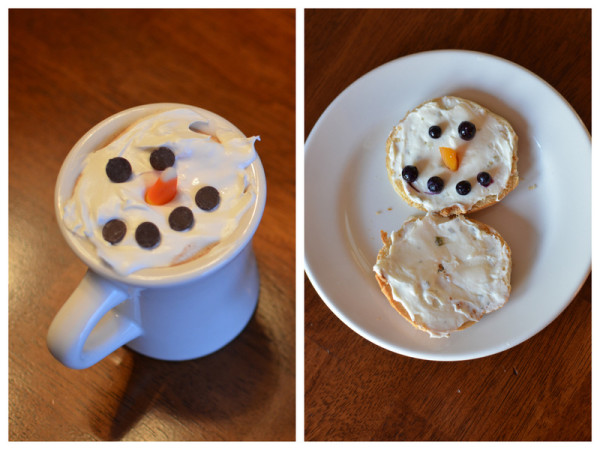
I usually can’t resist a little themed food when we’re studying a topic. Melted snowman cocoa and a snowman bagel fit the bill perfectly. The bagel face is made from blueberries and a piece of dried apricot. (Note: Be sure you have regular cream cheese for the bagel. Don’t be like me and only have chive and onion cream cheese.)
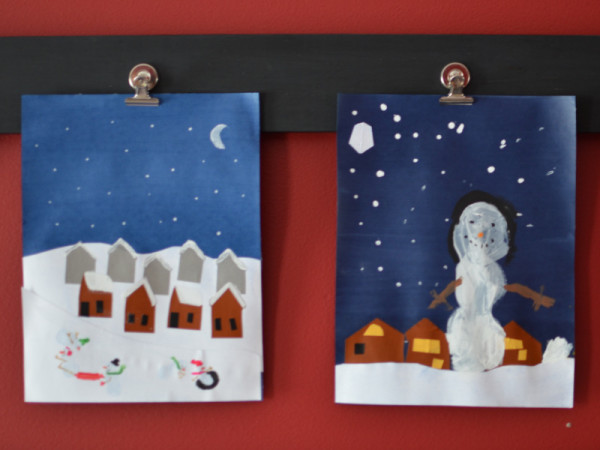
To finish the week we enjoyed a snowman art project from Deep Space Sparkle. She based it on the book Snowmen at Night, a delightful picture book we’ve enjoyed for years.
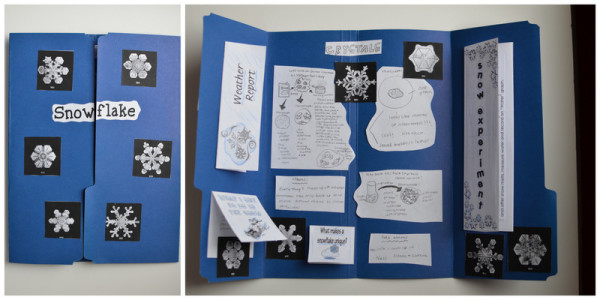
Inside my daughter’s lapbook you can see the minibooks from the Homeschool Share unit and drawings she made when we examined crystals under the microscope.
If you’re still in the throes of winter like me, take a peek at my Winter Activities Pinterest board. You’ll find ideas that are educational, crafty, and just plain fun!
I’m linking up with these great hostesses–join the fun and see what other homeschoolers are doing!


A Collage of Busy Hands
Our week was filled with hands-on activities. I love incorporating busy hands in our schoolwork–activities that reinforce the learning or create useful or beautiful items are always appreciated. And this week nearly every subject had us making and doing.
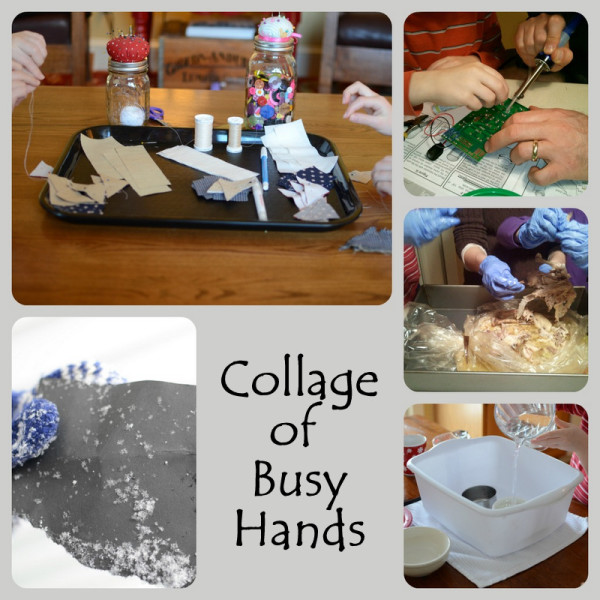
- Sewing a quilt square is a project from our Time Traveler’s unit on the 1800s. I adore doing crafts with my children that become keepsakes and this one fits the bill, along with showing them the work involved in the quilts that pioneer women made. We’re doing all the sewing by hand, just one or two squares at a time as I read aloud. They both enjoy it and are excited to see the pattern coming together.
- My husband and son (both quite electronically inclined and prone to gadget love) built an electronic kit to learn about soldering. This was their first foray into electronics together, they loved it and are working on another kit already. I have put in a request for a robot that cleans the house for me.
- We continued our bird studies by examining a chicken skeleton. Yes, it was our dinner. Yes, my husband gave me an odd look when I said we would bake a chicken for dinner so I could use the bones for schoolwork. Yes, my daughter thought it was gross–but then was fascinated by the experience. I’ll have a full post on our bird unit when we finish.
- More hands-on-math for my son: this time capacity estimation. I’ll also share more on that in a later post–just one note here: have towels handy.
- I’m preparing a snow unit study for a fun midwinter change. We’ll be doing it in two weeks and I had an activity in mind for the unit, but looked out Wednesday to see the perfect snowflakes falling. Reminding myself to be flexible we took advantage and spent time being amazed by nature and the seemingly simple but actually miraculous snowflake.
The neatness of our house suffered quite a bit along the way, but it was a good week. What are your favorite hands-on activities?
Thank you to the wonderful hostesses with fun link-ups on Fridays. Be sure to join the fun and see what other homeschoolers are up to!
Hands-On Math: Even and Odd
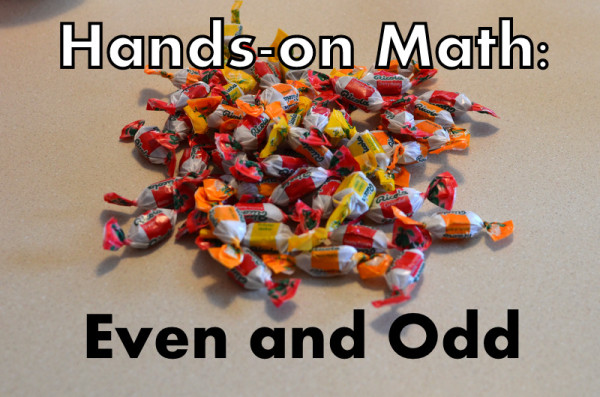
My son understands math best when the teaching is hands-on. I was working on math concepts with him today and trying to explain odd and even numbers. I was using a number chart but didn’t see the light bulb going off. The bowl of cough drops on the counter (can you tell a cold and flu have gone through our house?) caught my eye and I grabbed a handful.
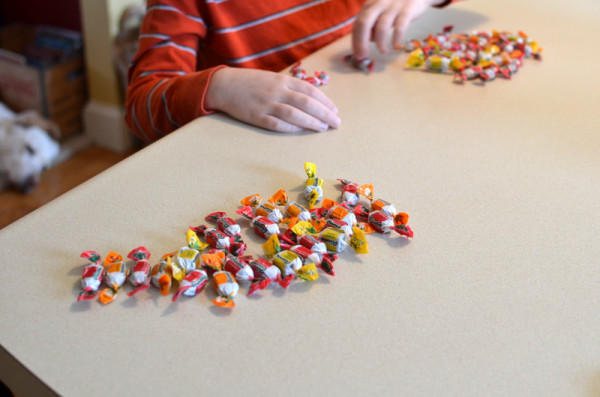
“Let’s divide these between us,” I said. And for each word in silly sentences I made up we each took one cough drop and added it to a pile in front of us.
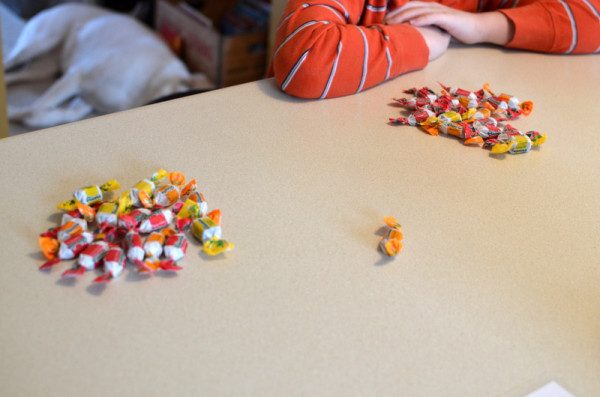
Oh, look! One is left over. We can’t divide it evenly so it’s an odd number!
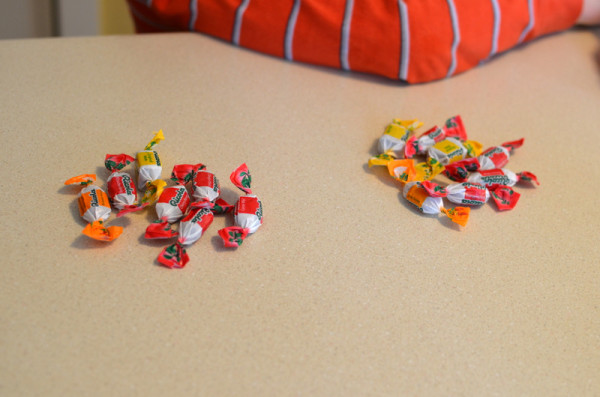
This time we both get the same amount! It can be divided evenly so it is an even number!
It’s ridiculously simple. I’m noticing that even though I tend to look for more complicated procedures first, many things that work are simple (like how he learned coin recognition). The concept and vocabulary clicked in his head, and he thought it was fun and asked to play again and again. We took turns grabbing handfuls of cough drops and guessing if it would be odd or even.
Have you stumbled upon any simple hands-on math teaching strategies I can use with my first grader?
Digestive System Demonstration

For our homeschool science fair my seven year old son’s topic was the human digestive system. He is a hands-on learner so I wanted him to have a physical demonstration to present. I wanted a demonstration he could do with very little help from me and explain to an audience. I’m happy to say that after several trials and adjustments at home his presentation at the science fair this week was a success!
Demonstrating the Steps of Digestion:
Want to show your kids the wonders of digestion? This demonstration was great in front of a group of kids, but simple enough to do at home, too. I am pretty sure my kids won’t forget the steps of the digestive process after this.
Supplies:
- small dish (large enough to use masher in)
- peanut butter sandwich
- small amount of water
- 1/2 cup milk
- scissors
- masher
- funnel (optional)
- quart size Ziploc bag
- Coke
- knee high pantyhose, or a leg cut off of child’s tights
- large bowl or basin
- tray with paper towels
Step 1: Explain that the small dish is like your mouth. Begin to cut the sandwich into bite-size pieces, explaining that the scissors are acting like your front teeth, which are designed for cutting.

Step 2: Pour in a small amount of water. This is the spit. (Expect giggles here.)

Step 3: Add about a half cup of milk. Peanut butter sandwiches can be a bit dry, you know.

Step 4: Use the masher to mash the food and drink, explaining that the masher is like your back teeth which are designed for grinding up the food.

Step 5: Once the sandwich and milk resemble slop, empty it into the quart size bag which you can explain is like the stomach. You may dump it directly in the bag, or through a wide-mouth funnel to stand in as the esophagus. This process required an extra set of hands, thus a lack of photos for this step!
Step 6: Add a little Coke. Explain that the stomach has chemicals (acids) that break down the food. [Note: Saliva also works on food break down as do other enzymes and bile added in the small intestine–given the age of my son I kept it simple. You could certainly add a little green food coloring and talk about the liver, gallbladder and bile…then there’s the pancreas…]

Step 7: Using your hands mix the food and Coke in the bag. Explain how your hands are working like the muscles in the wall of the stomach mixing and churning this slurry. This is when it starts looking a little gross. (Depending on your audience you could pause here and mention the process of vomiting.)

Step 8: Now the food is ready for the small intestine. Have your basin ready and pour your slurry into the nylon. Liquid will leak out through the material. You can explain that the fluid is like nutrients your body is removing from the food in the small intestine. Feel free to squeeze a little for effect.

Step 9: Now for the large intestine. You could squeeze the food into a second nylon, but we just stuck with one and explained that the food was now moving into the large intestine. Lay the nylon on multiple paper towels layers and roll it up tightly, squeezing and patting as you go. Explain that our body takes all the available water out of the food that remains in the large intestine.

Step 10: That’s where we left it at science fair. We’re pretty relaxed around our house, especially in the name of science discussion. But I didn’t want to offend any other families so we chose our words carefully and left the “remains” in the nylons with a simple explanation that the next step would be the toilet. (You can cut a small hole in the nylon and demonstrate the working of the anal sphincter if you want to get technical.)

These are a couple of the websites and videos that gave me ideas to try: Teaching in Room 6, and this Squidoo lens.
In addition to demonstrating the steps in the digestive process we added two other hands-on components that were so simple yet illustrated so much.
Demonstrating Peristalsis:
How does food move through the digestive system? It’s simple to demonstrate. Take a section of nylons or tights open at both ends and a smooth round object. I used my 10-year old daughter’s tights and one of the large plastic Easter eggs. Hold the section of tights up with the round item in it, showing that gravity is not forcing the egg through the tights. Using your hands you can demonstrate the contraction of muscles that pushes the food through.

Visualizing the length of the digestive system:
This one really floors the kids. The idea for this demonstration came from a combination of one of the hands-on labs included in our Real Science Odyssey Life Level One curriculum (a good example of the simple activities that curriculum includes for hands-on learning) and the Science Matters blog. We cut various strings and yarns to the length of the actual organs in the digestive system. I liked the idea of making each item a different color or thickness to more clearly show the relative sizes. This is an easy one to just use what you have (rope, yarn, string, twine, flexible tubing, even a bag or bottle for the stomach if you’d like) to demonstrate the true-to-life measurements of a child’s digestive system. My son LOVED unrolling this one at the science fair.
- mouth (3 inches)
- esophagus (10 inches)
- stomach (6 inches)
- small intestine (15 feet)
- large intestine (4 feet)
Trust me, everyone’s eyes get big when you unroll the rope and tell them that their digestive system is that long, all coiled up inside their body.

*Note: if you like using accurate vocabulary, this was a great way to also demonstrate the difference between the small intestine and large intestine. I used a thin rope for the small intestine and a thick rope for the large. It helped my son understand (and then explain to others) that the small intestine is actually much longer than the large intestine, but is smaller in diameter.
Resources:
Other than the specific resources I listed already, these are the books and other things we used to learn all about the digestive system.
Magic School Bus Human Body: I love this DVD, and in the episode called “For Lunch” the bus travels through Arnold’s digestive system.
Easy Make and Learn Projects: Human Body has a terrific digestive system poster with flaps. We blew this up and used it as our display at science fair.
Blood and Guts: This book has fun-to-read explanations and a lot of hands-on demonstrations and experiments for the entire body.
Kidshealth.org has a short video on the process of digestion.
Have fun with hands-on learning about the digestive system!
Easy Homemade Play Dough and Its Many Uses
I received a recipe for homemade play dough years ago from a kindergarten teacher and I’ve lost count of how many times I’ve made it. It is soft and squishy and entirely satisfying to sink your hands into. It’s quick and easy to make and I think you’ll agree it’s far more fun than that store bought stuff!

Here’s the no-fail recipe for perfect play dough:
- 1/2 cup salt
- 2 packages unsweetened Kool-Aid
- 3 tablespoons oil
- 2 1/2 cups flour (more may be needed)
- 2 cups boiling water
Mix the dry ingredients in a large bowl. Add boiling water and oil. Stir quickly and mix well. When cool mix completely with your hands (I usually have my two willing assistants do this job). Add more flour if the dough is too oily. Store in an air tight container.
Using Kool-Aid packets to color the play dough also adds a fun scent. We keep it in a plastic container, and it lasts a month or so. Having a large amount of one color has worked out much better than individual containers of store-bought play dough in different colors. And you just can’t beat the squishiness!
My six year old son plays with it the most. Not only is it good for long periods of creative (and quiet!) play, it actually has been quite handy for schoolwork. It’s a way for my hands-on learner to practice letters and words.
When we were working on letter names and sounds I purchased a set of alphabet cookie cutters and would ask him to cut out certain letters for me. I also made frequent use of the ABC play dough mats by Jolanthe of Homeschool Creations. Print them up, pop them into a page protector or laminate them, and they can be used over and over. I would have my son make snakes and then form the letters for me. This worked especially well when he was mixing up letters (like B and D) because the picture on the mats helped reinforce the letter name and sound.

Now that he’s older I’ll ask him to make words for me. It’s fun hands-on practice that doesn’t involve writing on paper. There is only so much writing I can get him to do in a day, but if school involves getting out the play dough he’s pretty agreeable.
In case you’re wondering, he uses the play dough for hours outside of our school uses. His current obsession is tanks, and he uses the play dough to build tank armies. In the photo you can see his book on tanks in the background. After all, even when playing one must be accurate when it comes to tanks.

The funny part is that just the other day I realized there was more than just a battle going on–he was testing! Do you see the tank without a turret that he’s still building? The little object sticking out of the hole is the man. (Or should I say crash test dummy?) After the battle he pulls off the turret or cuts into the tank to see how the driver fared.
A lump of play dough unleashes creativity: leave a fresh batch on your counter and see what it becomes!
Hi, I'm Heidi and I homeschool my two sweet kids. I want them to know that learning is an exciting lifelong adventure! We love great books, unit studies, notebooking, lapbooking, and hands-on learning.